COMP 3000 2011 report ttian1
Part1
Background
The name of the distribution I choose is CRUX. It is a lightweight, i686-optimized Linux distribution. It is delivered by a tar.gz-based package system with BSD-style initscripts(initialization scripts follow the BSD-style)<ref name="BSD-style"> BSD-style initscripts. Retrieved December 12, 2011 from http://crux.nu/Main/Handbook2-7#ntoc50</ref> and also utilizes a ports system to install and upgrade applications.<ref name="About Crux"> About CRUX Linux. Retrieved October 18, 2011 from http://crux.nu/</ref> The ports system is a term refers to a remote repository containing ports and a client program capable of downloading ports from that repository.<ref name="ports-system"> About Ports system. Retrieved December 12, 2011 from http://crux.nu/Main/Handbook2-7#ntoc32</ref> BSD is a definition which stands for Berkeley Software Distribution and it has been considered a branch of UNIX—"BSD UNIX". <ref name="BSD"> Retrieved December 12, 2011 from http://en.wikipedia.org/wiki/Berkeley_Software_Distribution</ref>
Unlike other distributions, the primary goal of CRUX is not to be popular or to put as many features as possible into the system. In fact, CRUX is targeted at experienced Linux users especially. CRUX is first created by Per Liden (found through wikipedia) and the project has grown into a reasonable team whose members are all volunteers sharing a common philosophy. The team provides the core and optional packages for CRUX.
The crux-2.7.iso file is 226 MB. However, after installed, it will become 1.3GB and even more which depends on the ports and packages user want to install.
Installation/Startup
Attention: I follow the handbook and finish all the operations on it, but I can not run the kernel for CRUX. As a result, the basic operation is not feasible and I will use Hannah Montana Linux to do the basic operation section.
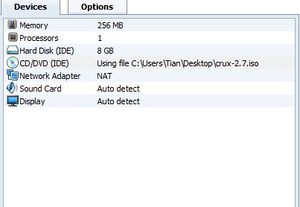
Firstly, I run the iso file through VMware and it shows me interface which looks like the scs.lambda machine, in other words a shell with command line. Then I follow the handbook <ref name="handbook">Handbook. Retrieved October 18, 2011 from http://crux.nu/Main/Handbook2-7 </ref> provided by the crux.nu to do the installation.
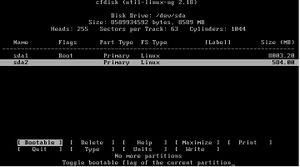
1. As introduced in the handbook, the first thing I need to do is to partition my hard disk(the virtual one in fact). I login as root and use “fdisk /dev/sda” command to do partition, but I get a bad partition table and I can not mount my partition.
As a result, I try “cfdisk /dev/sda” command and I get a good partition table.
2. I use “mkfs.ext4 /dev/sda1” command to build my file system. Then I use “mount /dev/sda1 /mnt” to mount my sda1 partition.
3. I use “mkdir /mnt/var” command to make that directory which is for the later installation.
4. I use “mount /dev/sda1 /mnt/var” command to mount the “var” directory.
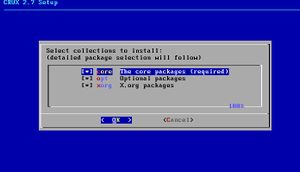
5. I use “setup” command to go into the CRUX setup windows to start the package installation script.
After the setup, I can compile the kernel by using following commands:.
6. # Mount --bind /dev /mnt/dev
7. # Mount --bind /tmp /mnt/tmp //Attention: the bind option for Mount command make the first parameter of the arguments inherits the properties of the second parameter.
8. # Mount –t proc proc /mnt/proc
9. # Mount –t sysfs none /mnt/sys
10.# Chroot /mnt /bin/bash
//Attention: Chroot to change root for current running processes.
11.initiate the password by using command “passwd”.
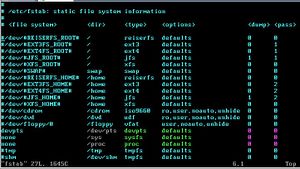
12.use vim to edit files such as fstab, rc.conf, /rc.d/net and so on.
Then I go to the /usr/src/linux-2.5.35.6 directory to make instal.
Using command:
13.# Cd /usr/src/linux-2.6.35.6
14.# Make menuconfig --------//go into a configure script
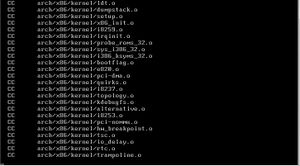
15.# Make all After install a lot of files, input “make modules_install” for another installation.
16.# Cp arch/x86/boot/bzImage /boot/vmlinuz
17.#cd System.map /boot
18. The last step is to edit the /etc/lilo.conf to boot the kernel I have just compiled and then run lilo to make the new system bootable.
After performing these steps, the CRUX should be installed successfully.
Though I fail to run the kernel for CRUX, I learn a lot through the installation.
1. Because I use a virtual machine to run Crux, the label of the disk is sda, rather than hda.
2. Sometimes there are more than one way to do the same one thing in Linux, but one or more of them may never work well and meet kinds of problems such as “permission denied”. If so, just use other method and it may work well. For example, the partition in my distribution.
3. Learn quite a lot of commands and much familiar with the shell(bash) than before.
4. The MD5<ref name="de5"> Retrieved December 12, 2011 from http://en.wikipedia.org/wiki/MD5 </ref> is the Message-Digest Algorithm which has been employed in a wide variety of security applications, and is also commonly used to check data integrity. When I download software which provides md5, I should check the md5 before installation to make sure it is safe.
5. Os works on their corresponding CPU, such as x86 and i686.
6. Familiar with command “which” and “whereis”, as the command line does not show the directory.
7. Cat command is very useful to view files and vim is so powerful that I can use it to edit system files. And I think that is very dangerous.
8. Chmod 777 * is dangerous but useful sometimes because it will make files writable, readable and executable to all the groups.
9. Learn about the “mount”, “swapon” command and so on.
Usage Evaluation
From my point of view, as I am a fresh man to Linux, CRUX is really quite targeted to experienced users. Just as the developer says, I do have to do almost everything by myself by using the shell, even compile my own kernel! And the command line is only the “#” symbol, rather than shows almost the full directory in other distribution of Linux such as Ubuntu. So I have to be very familiar with the directory commands and clearly know what I am doing and where I am, or I have to use “cd ..” command to go back to top directory and go into the directory I want a again and that makes me think that the CRUX is not very user friendly. However, as one of the features of CRUX, it really makes the screen “light and clean”. Another feature of CRUX is its ports system, and it makes it much easier to install and update package. CRUX does not contain the gcc C compiler. And it does not install KDE automatically, so the UI looks like the lambda machine we use at laboratory. And I think using Crux is much more difficult than using Ubuntu. At last, I want to say that I choose CRUX because it sounds cool and it is a lightweight distribution of Linux. Though it really takes me a lot of time to do with and be familiar with CRUX, I love this distribution because it forces me to learn much more about Linux from the surface to the kernel.
Part2
Software Packaging
Packaging Format and Utilities
Hannah Montana Linux is a unix-like Linux Operating System based on Kubuntu. The package manager of it is Debian apt(for Advanced Package Tool) which is a higher level tool than dkpg<ref name="dkpg">Debian dkpg Package Tool. Retriever November 14, 2011 from http://en.wikipedia.org/wiki/Dpkg</ref> and the package format is .deb.<ref name=".deb"> .deb format. Retrieved December 12, 2011 from http://www.debian.org/doc/manuals/debian-faq/ch-pkg_basics</ref> This package manager works with dkpg to install, remove, update, resolves problems of dependencies and retrieves the requested packages.<ref name="apt">Debian Apt Package Tool. Retriever November 14, 2011 from http://wiki.debian.org/Apt</ref> In addition to apt and dkpg, Hannah Montana Linux also use aptitude as one of utilities for package management.
Listing Installed Packages
As Hannah Montana Linux uses dpkg, apt and aptitude as packager tools, there several ways to get the list of installed packages.
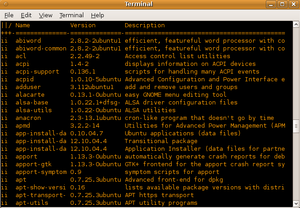
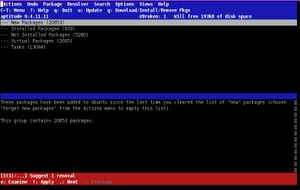
You can use command “dpkg –l” or just use “aptitude” to go to the package management windows provided by aptitude to view all the installed packages.
Adding and Removing Packages
To add packages, you can use dpkg -i <package name.deb> where your current directory should contain the package. You can use "aptitude" command to install packages in the aptitude windows or use "apt-get install <package>” command to do the installation.
To remove packages, you can use "dpkg -r <package_name>" which will leave the configuration file or "dpkg -pure <package_name>" which will remove the configuration as well. You can use "aptitude" command to remove packages in the aptitude windows or use "apt-get remove <package>” command to do that.
Software Catalog
Major package versions
Reference
<references />
