COMP 3000 2011 Report: Macpup
Part 1

DISTRIBUTION NAME: Macpup
GOAL: Fully featured lightweight OS, capable of running in RAM
TARGET AUDIENCE: Linux newbies, and users who may have an older slower PC
DEVELOPER: Johnny Lee
DOWNLOAD LINK: Official Macpup Website
FILESIZE: Approx. 165Mb
HERITAGE: Puppy Linux
Background
The distribution we chose is Macpup, and our report will be based on the latest version (Macpup 5.2.8). Older versions can be downloaded here.
Macpup is based on Puppy Linux which both share a common goal - to provide a lightweight fully featured OS that can run in RAM and is very fast. Macpup provides a fully featured collection of applications for office, graphics, multimedia and internet right from the start.<ref>Author, Publication, date of publication, "Macpup: A beautiful derivative of Puppy Linux", October-13-2011</ref> The distribution mainly targets users who want to get their old PC up and running, and is also very friendly for Linux newbies. It can be loaded with very minimal system requirements and still performs quite well.
Macpup is being developed by Johnny Lee, and can be obtained here with approximate file size of 165Mb’s. Macpup is a derivation of Puppy Linux which has been built from scratch and is not based on any other Linux distribution. It is known for its small file size, and incredible speed. <ref>Author, Publication, date of publication, "Puppy Linux", October-14-2011</ref>
Window Managers
Installation/Startup
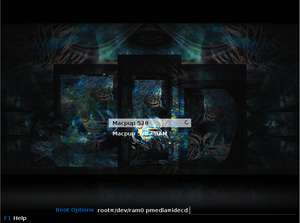
The first boot of Macpup was quick as promised. At first we were presented with two options, "Macpup 528" and "Macpup 528 RAM". The difference between these two options comes after you've done an install of Macpup. After you have some files saved, choosing the Macpup 528 option will load the system along with all your saved files/settings/etc. The Macpup 528 RAM option only boots the system and will not display the changes you've made, or files you've created. The purpose of this is to allow you to test things out within Macpup without taking the risk of damaging your personal files.<ref>Author, Publication, date of publication, "Using Macpup: Hardkap Forums", October-15-2011</ref>
We gave our virtual machine 1GB of RAM to use, however from looking at htop (an interactive process viewer for Linux, included in Macpup) the system only ever seemed to use around 40 to 45MB. The official Macpup forums recommended 256MB of RAM or more.
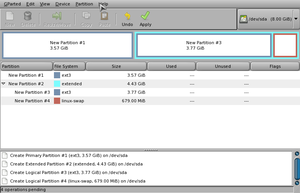
We ran into trouble trying to get Macpup installed to our hard drive. The distributions we have experience with (such as Ubuntu or Fedora) offer very simple 1 click install buttons that might ask you a couple of questions, but then take care of the installation process themselves. Macpup does have a "universal installer" tool, however it won't run until the drive you want to install on has been partitioned correctly, which you have to do yourself in a program called GParted (it comes pre-installed on Macpup). After a quick search on Google we found instructions on how to get everything set up properly.
We then hit another roadblock as we were both using VMware Workstation 8, and for whatever reason Macpup could not detect the virtual hard drive that we wanted to install it to. After some searching we found several possible solutions, however the easier alternative seemed to be just running it in VirtualBoxinstead. Macpup detected our hard drive file within VirtualBox, and we were able to partition it using GParted.
After the drive was partitioned we were able to run the universal Puppy installer and complete the installation to the hard drive with no problems.
USB Installation
One of the features of Macpup, and Puppy Linux in general, is that you can install it onto a USB flash drive and take it with you anywhere. Installing Macpup onto our flash drive was incredibly simple. First we burned the Macpup ISO file onto a disc to make a live CD and then booted up off of that. Once we had Macpup loaded up we plugged in our flash drive and chose the option to install to a USB flash drive from the universal installer. Macpup detected our USB device right away and took care of the entire installation process in a couple minutes, with a few prompts to ensure we knew the data on the device was going to be erased and what not. After the process was complete we shut down Macpup and booted off the flash drive with no problems.
Basic Operation
Usage Evaluation
References
<references />

