Mobile App Dev 2022W: Getting started with Xcode
Below are instructions on how to get a first SwiftUI app running in Xcode and ready to install on one of your iOS devices.
To follow this, you'll need a machine running MacOS Big Sur or Monterey (version 11 or 12) and an Apple ID. You do not need a developer account; however, make sure that your device uses the same Apple ID as the one you configure below.
Installing Xcode
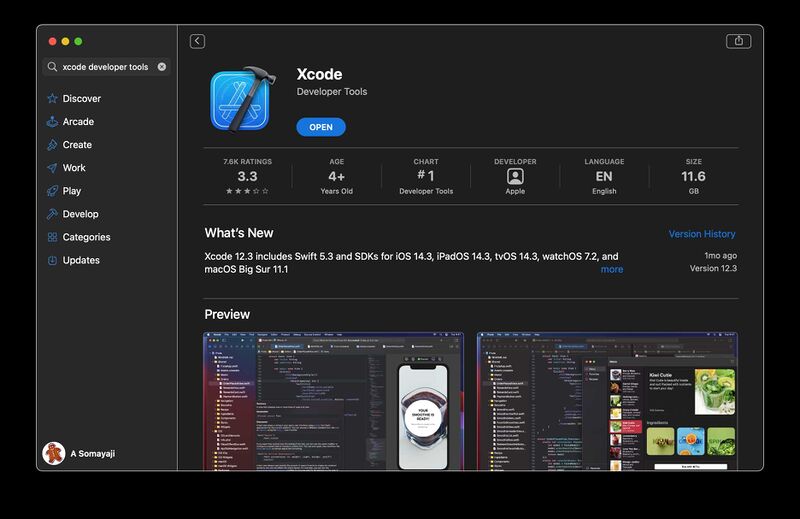
First, you need to download Xcode from the Mac App Store. Once you find it, installing it should be as simple as clicking on the install button. Once installed, you should see a screen that looks something like this:
Creating a project
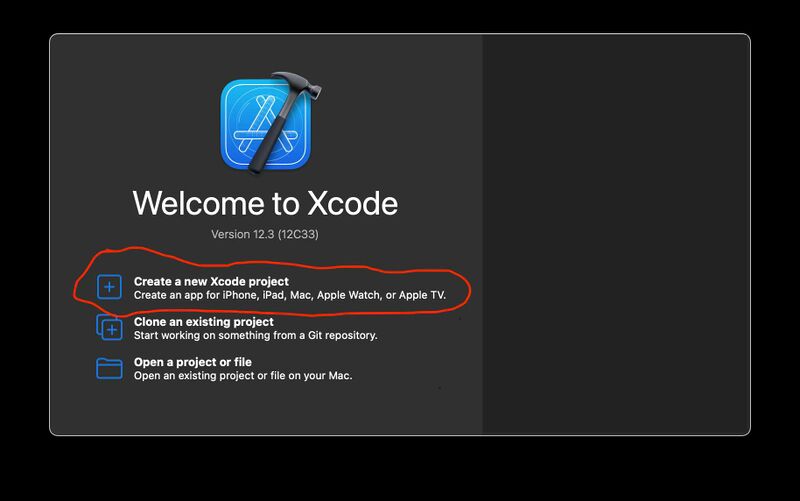
Once you have Xcode installed, run it. When it starts, you should see a splash screen, as shown below. Click on create project as shown.
If you don't see this screen, don't worry, just select File->New->Project through the top of screen menus.
Project template
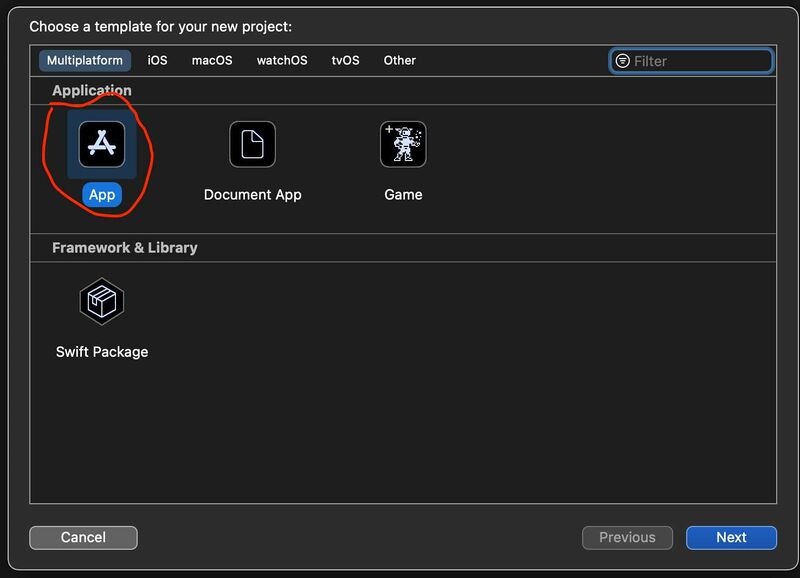
You'll now be asked to select a template. Select the multiplatform app template, as shown here:
Project options 1
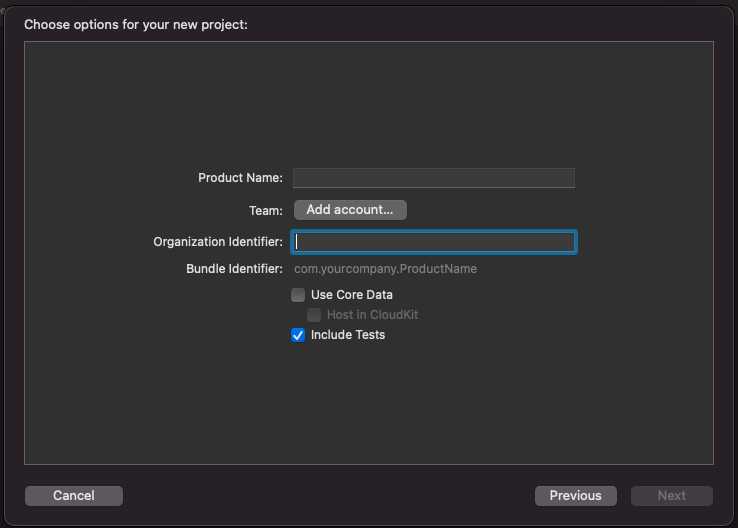
You should next see a project options screen that looks like the following if you've never run Xcode before:
Note that, beside Team, it says to add an account. You need to add an account in order to be able to run apps on a device. Go ahead and click on Add Account.
Adding an Apple account
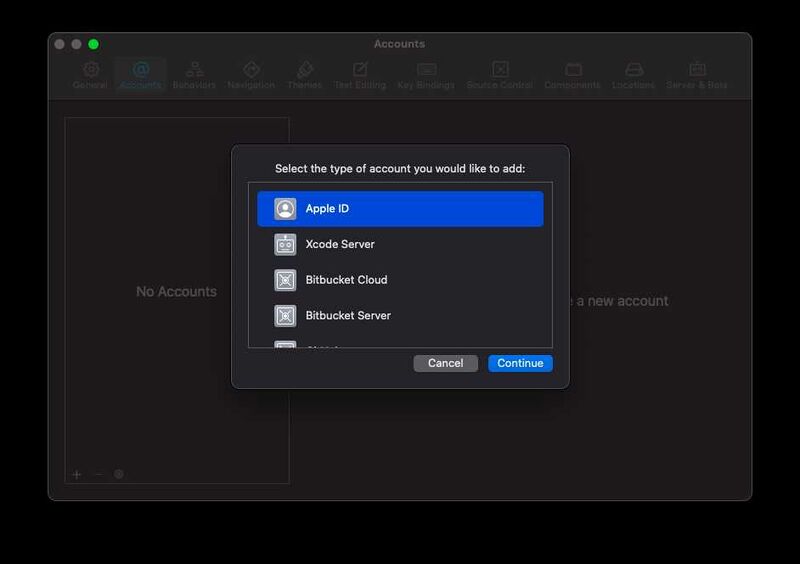
After clicking Add Account, it should take you to Account Preferences and should give you an option to add many kinds of accounts. Add an Apple account:
Adding Certificates
You'll need to create a certificate to go with your Apple ID in order install applications on a device. Create the certificates as follows:
Entering the Certificate Manager
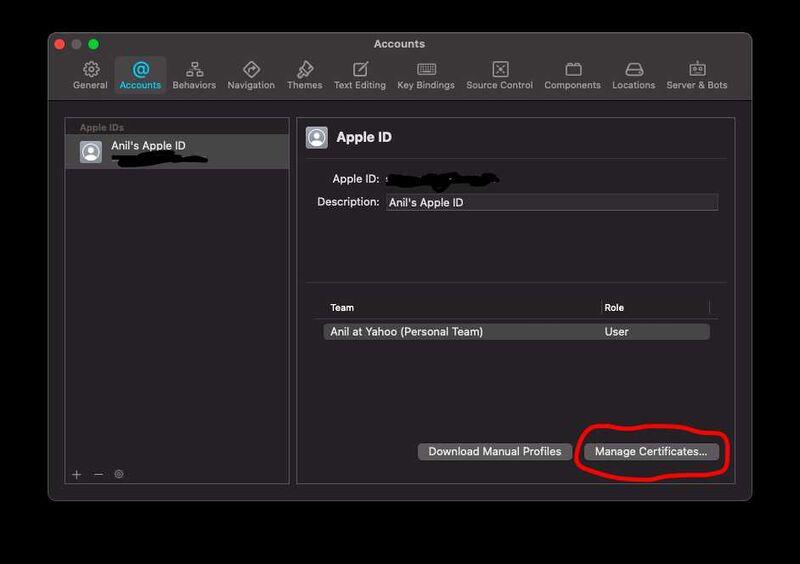
Once you've added an Apple account, you should see it listed. On this same screen note the Manage Certificates in the bottom right corner. Click on this button:
Create a certificate
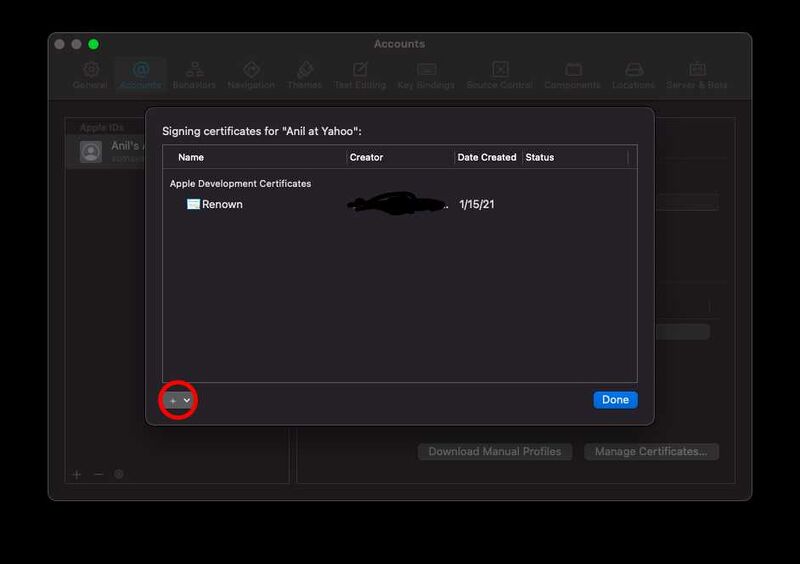
To create a certificate, click the plus in the bottom left corner. This button produces a menu which should just have one option, one for creating an Apple Developer certificate. Select it to create a certificate. After you do so, the dialog should list a certificate as follows:
Project Options 2
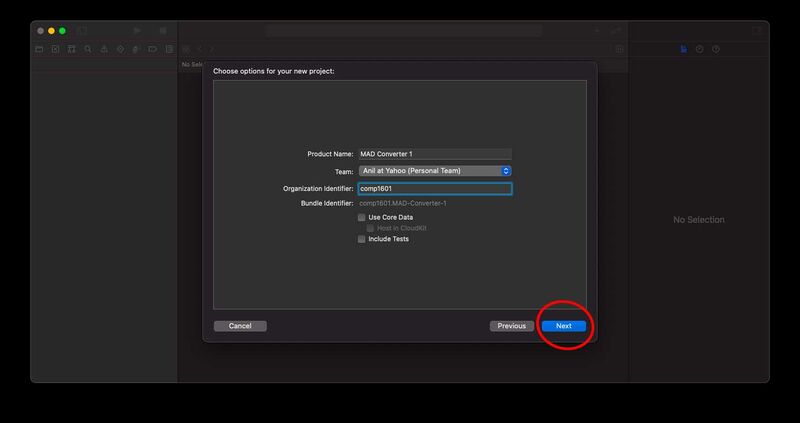
After having logged in with an Apple ID and creating a certificate, you should now be able to select your personal team in the project options dialog:
Saving and Version Control (git)
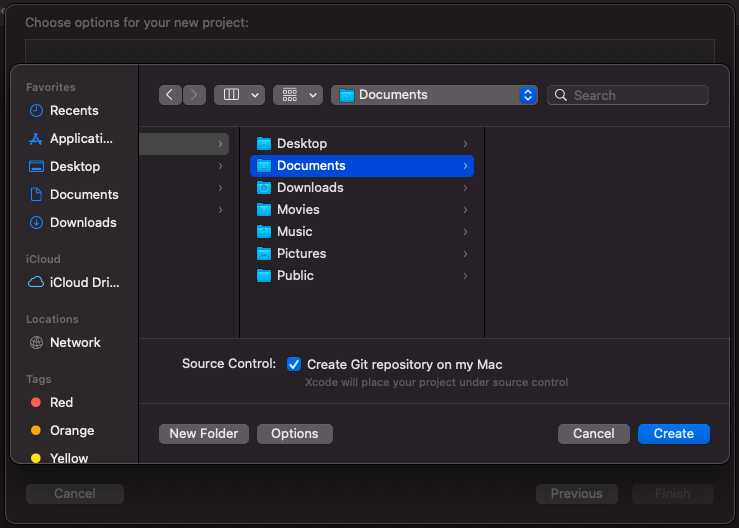
After finishing with the project options you'll be asked where to save the project. Note that by default Xcode will set up git for version control. This will cause problems as we will see.
Version control configuration error
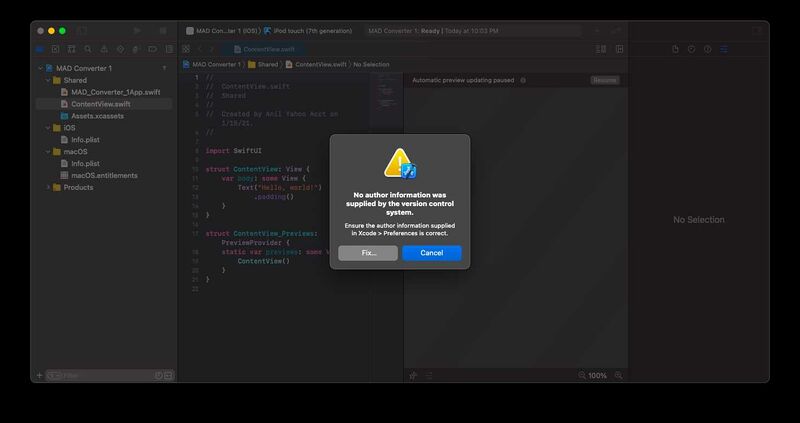
When first running Xcode you'll need to configure version control, as indicated by the following error:
Configuring git
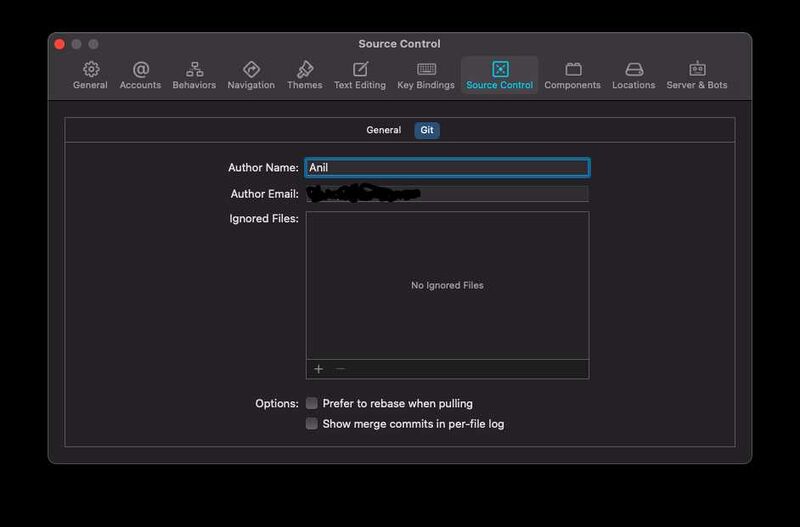
Fortunately, clicking on Fix takes you to the version control preferences where all you need to do is enter your name and email address. These will both be associated with every version control commit you do.
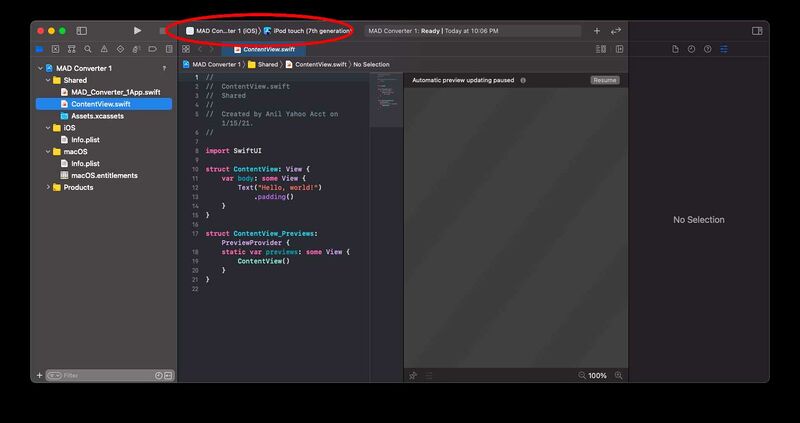
Choosing the build platform
Now, before you run your hello world program, select the platform on the top of the screen. Select a simulator for the device you'll be using. This selection will also influence how the preview pane looks. (In class I'll be selecting an iPhone SE 2020, as that is what I have.) Once you've done this, you can hit the run button in the top left (the play triangle icon) and Xcode should build and run your code in the simulator!
If you have a device connected to your machine via a Lightning cable (and the device is configured using the Apple ID you chose), you'll be able to install and run the app directly on your device by selecting it from the platform menu.
