VectorLinux
Background

NAME: Vector Linux
DEVELOPED BY: Robert S.Lange,Darell Stavem
GOAL: to be small and simple
TARGET AUDIENCE: casual users
SIZE:716,362KB gold e.d
LOCATION OF OS: in the VectorLinux website
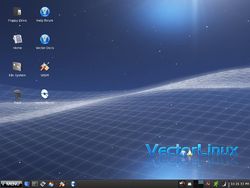
VectorLinux is a Linux distribution designed for the x86 platform. It strives to diverge from other OS distributions by focusing its resources to speed, performance, and stability rather than visual display and graphics. It keeps everything as small as possible while letting the user decide what their operating system is going to be. Vector Linux can be used and enjoyed by a variety of users; however it is geared towards casual users with its ease and simplicity. This OS distribution can be obtained by visiting the VectorLinux main website in the download menu. From the download menu the user has a choice between 4 different versions of the OS for specific uses. These include; SOHO edition (contains productivity applications – 1346.01MB in size), standard edition gold (most famous and most used – 699.57MB in size), Kde-classic edition (contains the basics of VectorLinux – 685.03MB in size), light edition (low memory requirements– 617.22MB in size). VectorLinux is derived from the Slackware Linux distribution, which is one of the earliest operating systems to be created on top of the Linux kernel.
Installation/Startup
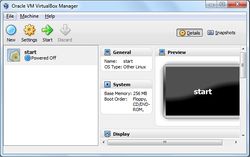
During this installation, VirtualBox was used to run the guest OS, VectorLinux standard edition gold while windows 7 was running as the host. In order to use VirtualBox one must download it and install it from their main website

Virtual box steps:

- Upon startup the user must click new to create a new virtual process
- Then the user must give a name to the virtual machine which will be used to indentify it and must also choose the guest OS and version they wish to install.
- The user must allocate the desired amount of memory they wish to use
- Next the user must choose between VDI,VMDK,VHD,HDD
- Afterwards choose whether the new virtual disk should be allocated as it is used or if it should be created fully allocated
- Choose location and maximum size of the guest OS
- Finally the user must Click create to save and finish the virtual machine
- Then the user can click start to begin the process of installing their desired OS.
VectorLinux now incorporates a GUI installation instead of a text based terminal, as before, however the installation is still a long process and requires some knowledge of basic Linux installations.

Steps for installing VectorLinux
- Upon startup of the installation the user is asked to adjust the screen size to their preferred option, although there is also an option to just auto adjust the screen to ones preference.
- The user is then asked to choose their language, in which the startup GUI will be in and choose next to proceed.
- At this point the installation process gets a little complicated, due to manual modifications involving disk partitioning. First of all the user must create a new partition by clicking on “modify my disk partition” and going to the partition heading and, once selected, click on “new”. Once the partition menu opens the user is given the choice of allocating the desired amount of memory to the current partition. First of all 3 different partitions must made, consisting of root(“/” 6-8GB size recommended), swap(as a general purpose rule one should allocate 2x the system ram), and home(“/home”). For the purpose of this installation the numerical values of 1077MB, 6292MB, and 1217MB will be assigned to one of the 3 partitions.
- At this point the user will be given the option to choose a Mount Point and Fylesystem for each partition. During this installation the Mount Point “swap” was assigned to the 1077MB partition given the fylesystem Swap, the Mount Point “/” was assigned to the 6292MB partition, given the fylesystem xfs, the Mount Point “/home” was assigned to the 1217MB partition, given the fylesystem xfs. Xfs is an advisable Fylesystem to use as it is slightly faster than others and reliable, if one is worried about data corruption.
- Next the user is given the option to select the software and processes that come with VectorLinux, by selecting manual, or by selecting auto, which downloads all the software pre-bundled with Vector. If the user selects manual it is important that they now what they are doing as removing a key program in VecotLinux may cause problems during initial startup only.
- Afterwards the user will be presented with a list of the installation summary and will be prompted to begin the actual install of the operating system.
- During the actual installation of VectorLinux the user has the choice of configuring the boot option, although it is not recommended as VectorLinux installation is very unstable when manual modifications are added.
- Regional settings can be configured at this point, such as the timezone.
- At this point the user must create an administrator name and password. It should be noted that this is mandatory and cannot be left blank.
- The user then has the option of creating a user account or, can leave it empty, and deal with it later.
- Network and hardware configuration can be set appropriately before actual running of the OS. However using virtual box it is not required as virtualbox will emulate the network cards, as well as the hardware on the host computer.
- Finally the installation is complete and the user can enjoy the world of VectorLinux.
- Note that during the VectorLinux installation if the user encounters an error during the installation, the whole thing will crash, so it is advisable not to do too much manual modifications if one does not know what he/she is doing