Editing COMP 3000 2011 Report: Ubuntu Studio: Difference between revisions
| Line 17: | Line 17: | ||
===Setting up a Virtual Machine=== | ===Setting up a Virtual Machine=== | ||
Start VirtualBox and click "New" button. This will open the New VM creation guide. Click "Next". Enter the name of your new virtual machine, and select "Linux" as the Operating System and "Ubuntu" as the version. Select an apropriate amount of memory for the VM. I chose 1024 MB for better performance. Next, select "Create new hard disk" and click "Next". The format for | Start VirtualBox and click the "New" button. This will open the New VM creation guide. Click "Next". Enter the name of your new virtual machine, and select "Linux" as the Operating System and "Ubuntu" as the version. Select an apropriate amount of memory for the VM. I chose 1024 MB for better performance. Next, select "Create new hard disk" and click "Next". The format for our purpose is not important, I chose the default VDI format. Click "Next" and choose the "dynamically allocated" hard-drive option and click "Next". Now choose the hard-drive size, I chose 8 GB. Click "Next" then "Create" to create your new virtual machine. Now start your new VM by double clicking it, then choose the iso image from your hard-drive as the virtual disc. | ||
===Installing Ubuntu Studio=== | ===Installing Ubuntu Studio=== | ||
Revision as of 05:38, 20 October 2011

Background
Initially released May 10, 2007, Ubuntu Studio is an officially recognized derivative of the Ubuntu distribution (based on Debian GNU/Linux) and, like Ubuntu, is developed by Canonical Ltd. and the Ubuntu Foundation and follows the same release schedule.
Focusing on audio, video and graphic enthusiast and professionals, the goal of the distribution is two-fold; to showcase the available tools Linux has to offer in multimedia production, and to provide an ehanced and streamlined environment for those tools.<ref>slavender (2011, 05 19). UbuntuStudio. Retrieved 10/19/2011, from Ubuntu Wiki: https://wiki.ubuntu.com/UbuntuStudio</ref>
Although based on Ubuntu, Ubuntu Studio contains additional configurations and software that results in the distribution being nearly twice as large as standard Ubuntu. The iso image is 1.5 GB (with a 3.5 GB full installation, including all bundled applications) and does not fit on a standard CD, although it can be installed using a DVD or USB drive. Ubuntu Studio’s current and archived releases are available from their official website.
Installation/Startup
For this guide, Ubuntu Studio was installed on the virtualization software VirtualBox version 4.1.2 by Oracle. Alternatively, you can burn the iso image to a DVD (CD is too small) or USB drive to install on real hardware.
Setting up a Virtual Machine
Start VirtualBox and click the "New" button. This will open the New VM creation guide. Click "Next". Enter the name of your new virtual machine, and select "Linux" as the Operating System and "Ubuntu" as the version. Select an apropriate amount of memory for the VM. I chose 1024 MB for better performance. Next, select "Create new hard disk" and click "Next". The format for our purpose is not important, I chose the default VDI format. Click "Next" and choose the "dynamically allocated" hard-drive option and click "Next". Now choose the hard-drive size, I chose 8 GB. Click "Next" then "Create" to create your new virtual machine. Now start your new VM by double clicking it, then choose the iso image from your hard-drive as the virtual disc.
Installing Ubuntu Studio
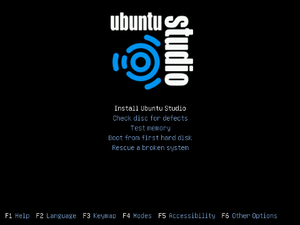
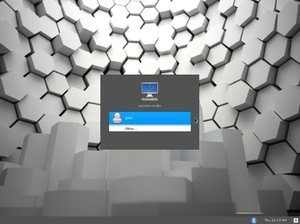
This guide is for installing Ubuntu Studio 11.04 Natty Narwhal. In contrast to standard Ubuntu, Ubuntu Studio does not have a graphical installer and has more installation options.
- Select the language for the installation. I chose English.
- You will see the initial installation screen that gives you the option to check disc defects, test memory, etc. Choose the "Install Ubuntu Studio" option.
- Select your language, I chose English, and country, I chose Canada.
- For the default keyboard configuration I opted to choose from the list. I selected USA, USA.
- Ubuntu Studio will now load additional components.
- You will be prompted to choose a hostname. This name is your computers identifier on the network. I chose "ubuntu-studio-machine."
- You will then be prompted to confirm your time-zone. For simplicity we said the given time-zone was incorrect and opted to select "Toronto" from the listed zones available. Choose the city that represents your time-zone.
- For the partitioning of the disk, I chose a guided partition of the entire disk.
- Select the partition and choose yes to write changes to disk.
- "Installing the base system" loader appears to install additional components.
- You can select your user and password.
- You have the option to encrypt your home network, incase your computer is comprimised. For my purposes I chose not to.
- I left the proxy blank also, as it was not needed.
- The installation now configures files. And now you are able to select the type of software that you want. The suite/plugin names are fairly self-explanatory; 2D/3D creation is for graphic/image processing, Audio recording and editing, LADSPA/LV2/DDSI and Tone generation and editing are audio manipulation software, and Video creation and editing is video production. Be sure to use the space bar to select each option. Only press Enter when you have made all of your selections. I opted to install all software.
Available Bundled-Software Suites/Plugins
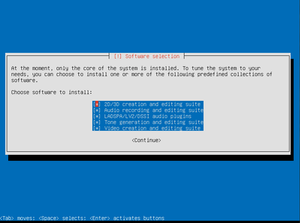
The bundled software suites/plugins can be customized on install. We opted to install all software. All bundled software is also available in the Ubuntu repository, and can be accessed after install.
- Bundled software suites/plugins:
- 2D/3D creation and editing suite
- Audio recording and editing
- LADSPA/LV2/DDSI audio
- Tone generation and editing
- Video creation and editing
Basic Operation
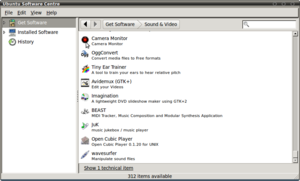
A nice feature offered in Ubuntu Studio was the ability to easily view the software already installed on the system. Also available was a full list of software that can be easily installed should the user desire it. Under Get Software there are 312 items, ranging from an adobe flash plug-in to a guitar effects processor, available to install at the users convenience. Ubuntu Studio typically uses a real-time kernel that has been modified to handle intensified audio, video or graphics works. This can be achieved since applications are able to request immediate CPU time reducing audio latency. The file system in this distribution is identical to that of the vanilla Ubuntu which makes it easier for those already familiar with Ubuntu to use.[1]
The Kernel
Ubuntu Studio offers a real-time kernel that has been modified to handle intensified audio, video or graphics works. This can be achieved since applications are able to request immediate CPU time reducing audio latency.
In the 10.x version of Ubuntu Studio they offered three different kernel options: The generic kernel, preempt kernel and rt kernel. They’re recommendations on choosing the right kernel for that user are: If low latency is not a must for the user’s needs then the recommendation is to get the generic kernel. However, if the user needs a system with low latency and has a 64-bit machine, then the recommendation is to use the preempt kernel. The preempt kernel is a soft real-time kernel which means that not all deadlines may be met (as with a hard real-time kernel) but a certain portion of deadlines will be met with the goal of optimizing some application-specific criteria. <ref>craigs63. (2011, 08 23). UbuntuStudioRealTimeKernel. Retrieved 10 17, 2011, from Ubuntu Documentation: https://help.ubuntu.com/community//RealTimeKernel</ref> And if the preempt kernel is still not enough for the user’s needs the last option is the rt kernel. The rt kernel is a hard real time kernel. Hard means that if the system were to miss a deadline it would result in a total system failure. Therefore, the goal is to have every deadline met. <ref>Real-time computing. (2011, October 19). Retrieved October 17, 2011, from Wikipedia: http://en.wikipedia.org/wiki/Real-time_computing#Hard_and_soft_real-time_systems</ref>
Therefore, as a whole given the nature of Ubuntu Studio's audio, video and graphic capabilities, it would be futile if there were high delays. For this reason, different Kernel’s are offered to allow the user to decide what they need. Unfortunately, with the 11.04 release of Ubuntu Studio the generic kernel is the only option offered. This kernel is usually recommended if low latency is not a must of the user’s need however at this time there is no other option. There is a note informing users that they eventually plan on offering a low- kernel with the 11.x releases. <ref>Vachan. (2010, 05 14). UbuntuStudioWhatIsUbuntuStudio. Retrieved 10 17, 2011, from Ubuntu Documentation: https://help.ubuntu.com/community/What%20Is%20Ubuntu%20Studio</ref>
The file system in Ubuntu Studio is identical to that of the vanilla Ubuntu which makes it easier for those already familiar with Ubuntu to use.
Usage Evaluation
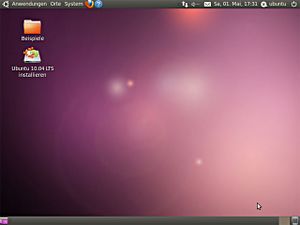
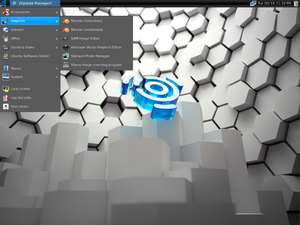
As a whole Ubuntu Studio seems to have a lot to offer. There is a clear goal of offering software specific for . If a user had a specific need for multimedia or simply wanted to experiment with that field Ubuntu Studio would definitely be a good idea. The size of this distribution is pretty large, 3.7GB in size which makes installation time long. The expected installation time for this distribution at the Computer Science lab was 7 hours therefore installation was done on our laptops. A disappointing aspect of Ubuntu Studio was the kernel. Most of the documentation has not been updated for the 11.x release. Thus, the advertised kernel was a real-time kernel. I was excited to see if I could notice any performance difference with a real-time kernel and how this would affect latency. I was disappointed to learn this release only shipped with the generic kernel. That being said, Ubuntu Studio has a nice theme, easy to adapt and serves it's function. I believe it really works towards their targeted audience. It seems to offer all the software a user would need. Another advantage is that there seems to be a lot of documentation surrounding Ubuntu Studio. Similarly, there is a community forum for any questions
References
<references />