COMP3000 Operating Systems W24: Openstack Instructions: Difference between revisions
Lianyingzhao (talk | contribs) mNo edit summary |
Lianyingzhao (talk | contribs) mNo edit summary |
||
| Line 7: | Line 7: | ||
# Most of you would need to refresh your SCS account to have the right entitlements for our course (or you may not be able to log in or not listed in the COMP3000-W24 project): https://newacct.scs.carleton.ca/scs_authentication/newacct-policy-form.php | # Most of you would need to refresh your SCS account to have the right entitlements for our course (or you may not be able to log in or not listed in the COMP3000-W24 project): https://newacct.scs.carleton.ca/scs_authentication/newacct-policy-form.php | ||
# Switch to the COMP3000-W24 project (top-left corner), and launch an instance (button on the right). | # Switch to the COMP3000-W24 project (top-left corner), and launch an instance (button on the right). | ||
#;[[File:select-project-w24- | #;[[File:select-project-w24-400px.jpg]] | ||
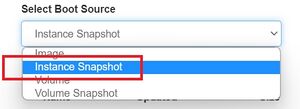
# Make a choice for necessary items according to the screenshots attached. | # Make a choice for necessary items according to the screenshots attached. | ||
#;[[File:boot-source.jpg|300px]] [[File:select-image-w24.jpg|580px]] | #;[[File:boot-source.jpg|300px]] [[File:select-image-w24.jpg|580px]] | ||
Revision as of 07:51, 5 January 2024
You can create a VM instance on the SCS openstack cluster for the tutorials, by doing the following:
(obvious steps are skipped)
- Connect to Carleton's VPN.
- Log in to https://openstack-stein.scs.carleton.ca/
- Most of you would need to refresh your SCS account to have the right entitlements for our course (or you may not be able to log in or not listed in the COMP3000-W24 project): https://newacct.scs.carleton.ca/scs_authentication/newacct-policy-form.php
- Switch to the COMP3000-W24 project (top-left corner), and launch an instance (button on the right).
- Make a choice for necessary items according to the screenshots attached.
- You must add "ping-ssh-egress" to the security groups, or you'll not be able to ping/ssh to your instance.
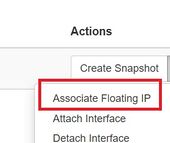
- Assign a floating IP.
- Then the new IP address (134.117.XXX.XXX) to the right of 192.168.XXX.XXX will be the one (floating IP) you will use to connect to your instance.
- Note down your floating IP and your instance name for subsequent uses for the rest of the term.


