COMP3000 Operating Systems F23: Openstack Instructions: Difference between revisions
Created page with "You can create a VM instance on the [https://carleton.ca/scs/tech-support/scs-open-stack/ SCS openstack] cluster for the tutorials, by doing the following: (obvious steps are skipped) # [https://carleton.ca/its/help-centre/remote-access/ Connect to Carleton's VPN]. # Log in to [https://openstack-stein.scs.carleton.ca/ https://openstack-stein.scs.carleton.ca/] # Most of you would need to refresh your SCS account to have the right entitlements for our course (or you may..." |
No edit summary |
||
| Line 1: | Line 1: | ||
You can create a VM instance on | You can create a VM instance on [https://carleton.ca/scs/tech-support/scs-open-stack/ SCS Openstack] for the tutorials by doing the following: | ||
# If you don't already have an SCS account for Openstack, you will need to create one here: https://newacct.scs.carleton.ca/scs_authentication/newacct-policy-form.php | |||
# Log in to [https://openstack-stein.scs.carleton.ca/ https://openstack-stein.scs.carleton.ca/] | # Log in to [https://openstack-stein.scs.carleton.ca/ https://openstack-stein.scs.carleton.ca/] | ||
# Switch to the COMP3000-W23 project (top-left corner), and launch an instance (button on the right). | # Switch to the COMP3000-W23 project (top-left corner), and launch an instance (button on the right). | ||
#;[[File:select-project-w23.jpg|300px]] | #;[[File:select-project-w23.jpg|300px]] | ||
Revision as of 13:52, 21 September 2023
You can create a VM instance on SCS Openstack for the tutorials by doing the following:
- If you don't already have an SCS account for Openstack, you will need to create one here: https://newacct.scs.carleton.ca/scs_authentication/newacct-policy-form.php
- Log in to https://openstack-stein.scs.carleton.ca/
- Switch to the COMP3000-W23 project (top-left corner), and launch an instance (button on the right).
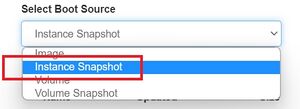
- Make a choice for necessary items according to the screenshots attached.
- You must add "ping-ssh-egress" to the security groups, or you'll not be able to ping/ssh to your instance.
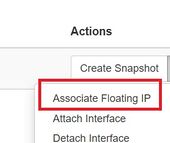
- Assign a floating IP.
- Then the new IP address (134.117.XXX.XXX) to the right of 192.168.XXX.XXX will be the one (floating IP) you will use to connect to your instance.
- Note down your floating IP and your instance name for subsequent uses for the rest of the term.


