COMP 3000 2011 Report: KnoSciences: Difference between revisions
| Line 20: | Line 20: | ||
== Installation/Startup== | == Installation/Startup== | ||
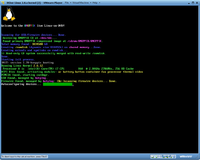
[[File:Knosciences Install.png|200px|thumb|right|Installation of KnoSciences]] | |||
[[File:Knosciences Desktop.png|200px|thumb|right|Desktop screenshot of KnoSciences]] | [[File:Knosciences Desktop.png|200px|thumb|right|Desktop screenshot of KnoSciences]] | ||
To setup the operating system in a virtual machine the following steps must be followed: | To setup the operating system in a virtual machine the following steps must be followed: | ||
#Open VMware Player | #Open VMware Player | ||
Revision as of 23:25, 19 October 2011
Background
- Distribution Name - KnoSciences<ref>Wiki article, Verhille Arnaud, September 19, 2011.KnoSciences Wiki</ref>
- Goals- KnoSciences was created to test powerful programs meant for education without the need for installation.
- Contains interactive geometry applications such as:<ref>4 Educational Linux Distributions, Eric Geier, August 2, 2010. LinuxPlanet.</ref>
- Declic
- Edugraphe
- Contains chemistry applications such as:
- Chemtool
- Katomic
- Contains algebra such as:
- Giac/Xcas
- Maxima
- Contains interactive geometry applications such as:<ref>4 Educational Linux Distributions, Eric Geier, August 2, 2010. LinuxPlanet.</ref>
- Target Audience - KnoSciences was created to be used as a learning aid for students who require the use of programs, but who do not have access to writing programs to the hard drive.
- Developers -
- Verhille Arnaud - Developer.
- Nathalie Carrie - Testing, support and software selection.
- Obtaining KnoSciences - Can be downloaded from the following link: download
- Size- The total download size of the file is 694Mb.
- Heritage -
Installation/Startup


To setup the operating system in a virtual machine the following steps must be followed:
- Open VMware Player
- Create a New Virtual Machine.
- When in setup wizard select the option to install the Operating System later.
- When choosing the guest Operating System choose Linux->Other Linux 2.6.x kernel.
- Continue wizard until finish.
- Right click on the newly created kernel and select Virtual Machine settings.
- In the memory tab set the amount of memory allocated to at least 1GB.
- In the CD/DVD tab select the use ISO image file option and select the file.
- Exit the settings menu
- Select Play Virtual machine and hit enter to begin installation of the Operating system.
There were no issues at all with installation, it worked fine the first try.
Basic Operation
Usage Evaluation
References
<references />