Editing COMP 3000 2011 Report: Zenwalk: Difference between revisions
| Line 18: | Line 18: | ||
Zenwalk is optimized for the i686 instruction set, but is backward compatible with i486. | Zenwalk is optimized for the i686 instruction set, but is backward compatible with i486. | ||
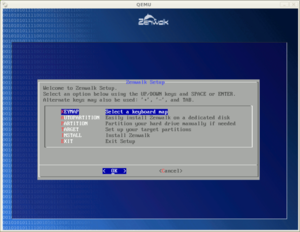
The minimum hardware requirements for Zenwalk are:<ref name="Zenwalk">Zenwalk Homepage. "Zenwalk". Accessed 11 October 2011. http://www.zenwalk.org/</ref> | [[File:ZW Install.png|thumb|alt=Install Screen 1|Install Screen 1]]The minimum hardware requirements for Zenwalk are:<ref name="Zenwalk">Zenwalk Homepage. "Zenwalk". Accessed 11 October 2011. http://www.zenwalk.org/</ref> | ||
:*Pentium III class processor | :*Pentium III class processor | ||
| Line 34: | Line 34: | ||
:*Openbox (519 MB) ([http://linuxfreedom.com/zenwalk/zenwalk-openbox-7.0.iso HTTP Download]) | :*Openbox (519 MB) ([http://linuxfreedom.com/zenwalk/zenwalk-openbox-7.0.iso HTTP Download]) | ||
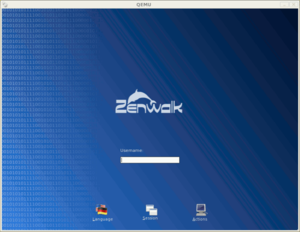
Two of these installations were tested: Standard and Live CD. | [[File:ZW Install 2.png|thumb|alt=Login Screen|Zenwalk default login screen]]Two of these installations were tested: Standard and Live CD. | ||
The Live CD was installed onto a Windows Desktop using [https://www.virtualbox.org/ VirtualBox] with default settings (although, if you can spare it, bumping the RAM to 512MB from 256MB leads to a noticeable improvement in performance). | The Live CD was installed onto a Windows Desktop using [https://www.virtualbox.org/ VirtualBox] with default settings (although, if you can spare it, bumping the RAM to 512MB from 256MB leads to a noticeable improvement in performance). | ||
The Standard installation was installed onto a netbook PC with an Intel® Atom™ N270 1.6GHz dual core x86 processor and 1GB RAM. The machine was formatted before hand. The requirements for this installation seemed to be fairly intense for an operating system that was marketed as "easy-to-use and user-friendly" since an average computer user might not know what a partition is, let alone how to create one. The installation guide<ref name = "InstallGuide">"How To Fresh Install ZenWalk" Accessed 18 October 2011. http://wiki.zenwalk.org/index.php?title=Fresh_install_ZW</ref> was very helpful in this case, and if the steps in the guide are followed, no extraneous issues arose. | |||
Zenwalk Standard installation requires two partitions, a Linux partition and a Linux Swap partition. Once the partitions are setup correctly, the installation process is straightforward and well-documented.<ref name = "InstallGuide"/> | Zenwalk Standard installation requires two partitions, a Linux partition and a Linux Swap partition. Once the partitions are setup correctly, the installation process is straightforward and well-documented.<ref name = "InstallGuide"/> | ||
Once your installation is complete, you should be at a desktop login screen similar to the one shown to the right. If you do not come to this screen, or have any other troubles with the installation, please refer to the installation guide<ref name = "InstallGuide"/> or post for help on the [http://support.zenwalk.org/ Zenwalk Forums]. | |||
==Basic Operation== | ==Basic Operation== | ||
Revision as of 22:28, 19 October 2011
Part 1
Background
Zenwalk Linux is a desktop Operating System built using the Linux environment. It is built on the Linux 2.26.x kernel base.
Originally called "Minislack"<ref name="Zenwalk Manual">Zenwalk Manual. "Start-up Guide." Accessed 17 October 2011. http://manual.zenwalk.org/startup_guide/zenwalk6_startup_guide_en.pdf/</ref>, Zenwalk is the brainchild of Jean-Philippe Guillemin in 2005. Zenwalk Linux is based on Slackware Linux<ref name="COMP 3000 Report on Slackware">COMP 3000 Report on Slackware. Accessed 17 October 2011. http://homeostasis.scs.carleton.ca/wiki/index.php/COMP_3000_2011_Report:_Slackware_13.37/</ref>, a robust Linux distribution faithful to the spirit of UNIX. Zenwalk is regarded as one of the fastest Linux distributions available in a binary version<ref name="Zenwalk Manual"/>. It is intended to be user-friendly for people who are both computer newbie's and Linux/Unix newbie's. The LiveCD is ~687MB in size, while the Standard .iso is closer to ~520MB in size.
Zenwalk was designed with the following objectives:<ref name="Zenwalk Manual"/>
- Be simple and fast
- Provide one application for one task on the install CD
- Be a complete development/desktop environment
- Be small enough to distribute on a single CD-ROM
Installation
Zenwalk is optimized for the i686 instruction set, but is backward compatible with i486.

The minimum hardware requirements for Zenwalk are:<ref name="Zenwalk">Zenwalk Homepage. "Zenwalk". Accessed 11 October 2011. http://www.zenwalk.org/</ref>
- Pentium III class processor
- 256 MB RAM
- 4 GB HDD space
Zenwalk is localized into many language installations, including French<ref name="ZW French">Zenwalk French. Accessed 17 October 2011. http://zenwalk-fr.org/</ref>, Spanish<ref name="ZW Spanish">Zenwalk Spanish. Accessed 17 October 2011. http://www.zenwalk-es.tk/</ref>, Hungarian<ref name="ZW Hungarian">Zenwalk Hungarian. Accessed 17 October 2011. http://hu.zenwalk.org/</ref>, Polish<ref name="ZW Polish">Zenwalk Polish. Accessed 17 October 2011. http://www.zenwalk.netne.net/</ref>, and more.
Zenwalk comes with multiple installation flavours:
- Standard (520 MB) (HTTP Download)
- Core (330 MB) (HTTP Download)
- Live CD (687 MB) (HTTP Download)
- GNOME (568 MB) (HTTP Download)
- Openbox (519 MB) (HTTP Download)

Two of these installations were tested: Standard and Live CD.
The Live CD was installed onto a Windows Desktop using VirtualBox with default settings (although, if you can spare it, bumping the RAM to 512MB from 256MB leads to a noticeable improvement in performance).
The Standard installation was installed onto a netbook PC with an Intel® Atom™ N270 1.6GHz dual core x86 processor and 1GB RAM. The machine was formatted before hand. The requirements for this installation seemed to be fairly intense for an operating system that was marketed as "easy-to-use and user-friendly" since an average computer user might not know what a partition is, let alone how to create one. The installation guide<ref name = "InstallGuide">"How To Fresh Install ZenWalk" Accessed 18 October 2011. http://wiki.zenwalk.org/index.php?title=Fresh_install_ZW</ref> was very helpful in this case, and if the steps in the guide are followed, no extraneous issues arose.
Zenwalk Standard installation requires two partitions, a Linux partition and a Linux Swap partition. Once the partitions are setup correctly, the installation process is straightforward and well-documented.<ref name = "InstallGuide"/>
Once your installation is complete, you should be at a desktop login screen similar to the one shown to the right. If you do not come to this screen, or have any other troubles with the installation, please refer to the installation guide<ref name = "InstallGuide"/> or post for help on the Zenwalk Forums.
Basic Operation

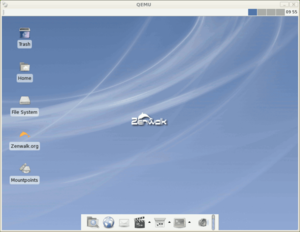
Once you have reached the login screen, login with the credentials you setup during installation and you will be brought to the default Zenwalk desktop (image on right).
As you can see, the Standard installation of Zenwalk comes with a fully functional GUI desktop environment using GNOME 3 UI features.
Similar to other GNOME desktops, the user can navigate the file system from the icon on the desktop called "File System", or through the "Home" folder, also located on the desktop. At the bottom of the screen, there is a toolbar available that can provide the same functionality for accessing the file system.
Zenwalk uses the X-Window System with GNOME to provide a window managing solution for the OS GUI. X Window Manager Config (xwmconfig) is the basic window manager configuration tool for X-Window. It is adopted from the Slackware distribution and adapted to fit into the Zenwalk implementation. This configuration tool will only be used by those users that wish to start X-Window in a different way. In this sense, it is appreciated that the configuration tool is included in the install package, but it was not tested in this scenario.
Usage Evaluation
Part 2
Part 3
References
<references/>