COMP 3000 2011 Report: Zentyal: Difference between revisions
| Line 13: | Line 13: | ||
==Installation/Startup== | ==Installation/Startup== | ||
Zentyal's disk image was downloaded from the official site and then installed on VirtualBox. I used the default settings for creating a virtual machine on VirtualBox: | |||
;Welcome page | ;Welcome page | ||
: Nothing needed to be done here | : Nothing needed to be done here | ||
| Line 38: | Line 32: | ||
: The default setting is fine | : The default setting is fine | ||
After you have successfully created a virtual machine, power it on and since this is the first time you power on your virtual machine, it will ask you what you want to boot up since there's nothing installed onto your virtual machine. You then boot up the Zentyal disk image (this is the same as popping in the CD into your CD drive but you are actually "mounting" the .iso file onto your virtual CD drive) that you downloaded from the Zentyal site. | |||
After you have successfully created | |||
If for some reason, you aren't prompt for that option, you can mount the file using VirtualBox instead by going to VirtualBox's menu bar and selecting Devices>CD/DVD Devices>Choose a virtual CD/DVD disk file... and browse for your Zentyal's disk image file. Afterwards, reboot your virtual machine and it will automatically boot from your virtual CD drive. It will then prompt you for a language then the boot menu will be displayed. Now, You have two options for installation: | |||
;Install Zentyal (delete all disk) | ;Install Zentyal (delete all disk) | ||
: This is the default mode, it deletes all disk contents and creates the | : This is the default mode, it deletes all disk contents and creates the necessary configurations to run Zentyal | ||
;Install Zentyal (expert mode) | ;Install Zentyal (expert mode) | ||
: This option allows | : This option allows the user to manually configure specifications for Zentyal | ||
When | I installed Zenyal using the default mode then went through the installation process. The installation process was quick, it didn't take me a long time as it did with Ubuntu. | ||
When I finished installing Zentyal and rebooting it, it automatically started up Firefox; this is used as a web interface that allows easy access to various networking administrative tools. There weren't many softwares installed, namely, only a few text editing programs (gedit and leafpad), an archive program, file managing program and Firefox. | |||
==Basic Operation== | ==Basic Operation== | ||
Revision as of 06:30, 17 October 2011
Part 1
Background

Zentyal was formerly known as the eBox Platform. Zentyal is an open source unified network server software package or others would call it, a unified network platform developed by eBox Technologies to provide easy and affordable enterprise level computer networks to small and medium businesses in order to improve the reliability and security of their network infrastructure and reduce operational costs.
Zentyal can provide various networking services such as acting as a gateway to enforce security access and improve efficiency to users connecting to the internet via the gateway configurations. It also provides various networking tools that pertain to the operation, administration and maintenance of network systems or unified communications server or even an office server that can manage printer sharing or file sharing.
Zentyal can be freely obtained from their site (zentyal.org) by downloading from their server. It's approximately 625,000 KB big and the file is in disk image format. You can make a purchase for additional add on or server subscriptions (in euro).
Installation/Startup
Zentyal's disk image was downloaded from the official site and then installed on VirtualBox. I used the default settings for creating a virtual machine on VirtualBox:
- Welcome page
- Nothing needed to be done here
- VM name and OS type
- Name: Zentyal
- Operating System: Linux
- Version: Other linux
- Memory
- 256MB
- Virtual Hard Disk
- Have the start up disk checked then create new hard disk
- Welcome to virtual disk creation wizard
- select VDI
- Virtual disk storage details
- Dynamically allocated
- Virtual disk file location and size
- The default setting is fine
After you have successfully created a virtual machine, power it on and since this is the first time you power on your virtual machine, it will ask you what you want to boot up since there's nothing installed onto your virtual machine. You then boot up the Zentyal disk image (this is the same as popping in the CD into your CD drive but you are actually "mounting" the .iso file onto your virtual CD drive) that you downloaded from the Zentyal site.
If for some reason, you aren't prompt for that option, you can mount the file using VirtualBox instead by going to VirtualBox's menu bar and selecting Devices>CD/DVD Devices>Choose a virtual CD/DVD disk file... and browse for your Zentyal's disk image file. Afterwards, reboot your virtual machine and it will automatically boot from your virtual CD drive. It will then prompt you for a language then the boot menu will be displayed. Now, You have two options for installation:
- Install Zentyal (delete all disk)
- This is the default mode, it deletes all disk contents and creates the necessary configurations to run Zentyal
- Install Zentyal (expert mode)
- This option allows the user to manually configure specifications for Zentyal
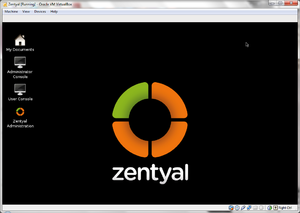
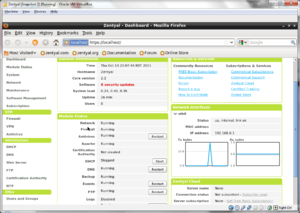
I installed Zenyal using the default mode then went through the installation process. The installation process was quick, it didn't take me a long time as it did with Ubuntu. When I finished installing Zentyal and rebooting it, it automatically started up Firefox; this is used as a web interface that allows easy access to various networking administrative tools. There weren't many softwares installed, namely, only a few text editing programs (gedit and leafpad), an archive program, file managing program and Firefox.
Basic Operation

Zentyal can be used as either a gateway and firewall for internet connection or a server for a small or medium sized network that either provides local or internet services.
After starting up Zentyal for the first time, it will automatically start up a web administration interface that will require you to put in credentials. Both the username and password are the same as the ones you put in during the installation process.
You will find that there aren't that many functionality when you first start up the OS. After you have put in the correct credentials, you can then install modules to create servers or manage and configure networking activities. If you have trouble with which modules to install, there's an option to view specific functions that packages up the modules for easy installation. Afterward a successful installation, you will be guided to a first time configuration wizard which walks you through the process of either setting up a server for a chat room or connecting to a network to view networking activities within the local area network.
Usage Evaluation
Zentyal is a good Unified network platform. It is made to be easy to set up configurations as well as installing different modules depending on what you plan to do with it and because it has a web interface for administrative access, it didn't take long to set up a particular configuration for the linux. Although, it might be a bit cumbersome when using the web interface since it limits the flexibility of configuring certain functions or modules but it's just there to help ease setting things up. The alternative way would be updating or installing/configuring settings via the terminal, though, that may require extensive understanding of networking.
References
http://www.distrowatch.com/table.php?distribution=zentyal. Retrieved 2011-10-12
http://www.zentyal.org/. Retrieved 2011-10-12
http://www.howtoforge.com/zentyal-as-a-gateway-the-perfect-setup. Retrieved 2011-10-13
http://www.unix-tutorials.com/go.php?id=4510. Retrieved 2011-10-15
http://www.unix-tutorials.com/go.php?id=4237. Retrieved 2011-10-15